Looking for DM860A Stepper Motor Driver from Longs Motors Nema 23 Motor 1600 oz-in
Doesn’t look to be one. However as it is relatively simple I made one from the data sheet (and thus it may or may not be correct). No pcb layer as it isn’t sensible to have one.
edit: Update to add lettering in breadboard.
edit1 (Mar 2023) found a nasty bug where the part will not be saved correctly in a .fzz sketch file. Please reload the part with this new one which has that bug corrected!
DM860A Stepper Motor Driver.fzpz (9.3 KB)
(12.5 KB)
Peter
Thanks peter.
Did you hook up to Aduino?
Are you using Fusion 360 to geneater g-code?
Nope, I don’t have one of these, just made a part from the data sheet. Driving it from an Arduino should be relatively easy, the input is an optocoupler that an Arduino port with an appropiately sized (the values are in the data sheet) series resistor.
Peter
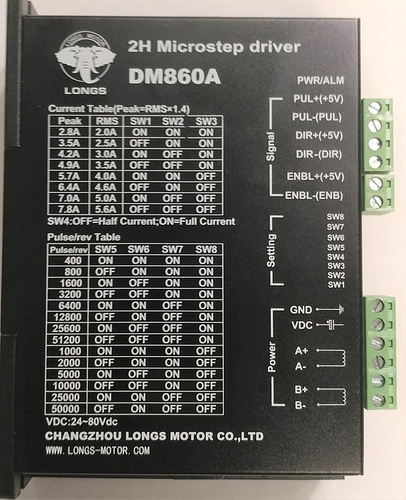
I have an addition to the DM860A, I would like to add the DIP Switch to show the settings (qty 8 switches) and add the settings table on the top of the unit.
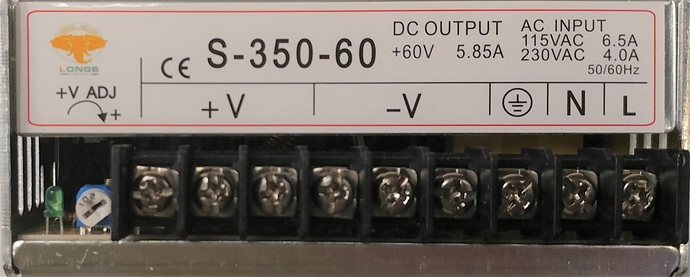
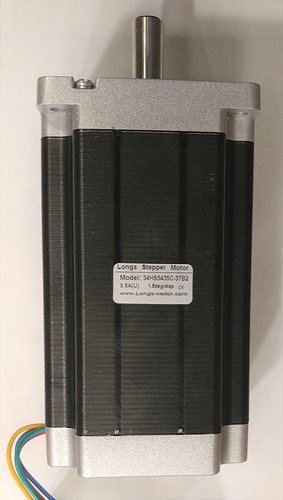
I would also like to add the power supplies and motor.
Attached are pictures of the 3 components.-oopps Looks like as a new user I can only post one picture at a time.
Can you help with these"
Also, can you tell me how to do it?
I do have Viso 2016 and Desault Draftsight 2017.
A am starting to learn Fusion360.
I am attaching pictures I took.
My email is gaewing@yahoo.com
Really appreciate your help.
Thanks
To modify parts you need to use an svg editor (the free one being Inkscape) to modify the svg files. Both it and parts creation have a fairly long learning curve though. Tutorials are here:
There is a stepper motor in core parts that will likely be close enough to what you have. The power supply I expect will be basically a box with two terminals and is easy enough to make. I’ll add the additional text in to the current part for the settings (I saw it, but was too lazy to add it.)
Peter
OK, I added the tables (text only I didn’t bother with the lines) and replaced the original part. You will need to delete the current part and then load this new one (as I didn’t create a new part and thus this one will have the same sequence number as the original). The power supply will have to wait for tomorrow, as noted the standard stepper should do for the motor.
Peter
Thanks Peter,
I was able to convert my pictures to the .svg with the software you suggested. I will keep working on it.
Is there a way to make the icons in the parts a little larger?
Where in the world are you located?
I downloaded the new revised file you did seem to notice the text missing. I change to a zip file and opened per what I saw in a video you Yooutube.
The Text was shown on the bread board. It looked like they were the same file but different names. I tried to win zip after the change so they had the same file but correct names, but I could not figure out how to change back to an .fzz file in windows 10.
The HTML header file I was lost
While that works, it usually doesn’t work very well and you are usually better to create an image using the graphics constructs although it is much harder.
I don’t know of one, but someone else may have a trick to do it.
They are a scaled down version of the breadboard svg usually so the capability is there, I’m just not sure the code supports it.
I’m near Vancouver Canada (on the west coast).
The most likely cause of this is that Fritzing failed to delete the original svg file when you deleted the original part and thus reused the breadboard svg file without the text. To fix that, delete the DM860A Stepper Motor Driver from your mine parts bin and close Frtizing. Then look in
user
and delete file
prefix0000_911c140c21fa07989d9ddccd6943645a_1.fzp
if it is there.
Then in
c:\Users\username\My Documents\Fritzing\parts\svg\user\breadboard
delete file
prefix0000_911c140c21fa07989d9ddccd6943645a_1_breadboard.svg
if it is there. Repeat this for the icon pcb (which should be empty) and schematic directories. Then when you reload the new part you should get the text. Fritzing has a bug where it forgets to actually delete the underlying files sometimes when you delete a part. As to the unzipping, you are unzippping the sketch file (.fzz) when you want to unzip the part file (.fzpz). If you unzip the part file you will get these files from it:
DM860A Stepper Motor Driver.fzpz unzips to:
part.prefix0000_911c140c21fa07989d9ddccd6943645a_1.fzp
svg.breadboard.prefix0000_911c140c21fa07989d9ddccd6943645a_1_breadboard.svg
svg.icon.prefix0000_911c140c21fa07989d9ddccd6943645a_1_icon.svg
svg.pcb.prefix0000_911c140c21fa07989d9ddccd6943645a_1_pcb.svg
svg.schematic.prefix0000_911c140c21fa07989d9ddccd6943645a_1_schematic.svg
after modifying the svg (and if using Inkscape, using a text editor on the resulting svg file to remove the trailing px from the font-size commands) you zip these 5 files again then rename the .zip file to .fzpz and Fritzing will then load the part. Note that if you do this, you need to keep a backup copy of the two directories
c:\users\username\AppData\Fritzing\roaming\Fritzing (which is a hidden directory so you need to enable hidden directories in explorer) and
c:\Users\username\My Documents\Fritzing (where username is your windows id)
because if you make a mistake, sometimes Fritzing will hang and corrupt the two directories above and to recover (without losing all your sketches) you need to move your backup copies back in to those directories. Probably a good place to start working with Inkscape is to try and add the lines around the text in the
svg.breadboard.prefix0000_911c140c21fa07989d9ddccd6943645a_1_breadboard.svg
from the part. To do so you need to get a white line (duplicate an existing one is what I usually do) and then modify its position and placement with Inkscape. You will likely discover that isn’t as easy as it sounds, but it will get you used to Inkscape. The Inkscape tutorials are quite good as well but it is very complex.
Edit: Here is a part for the power supply.
edit1 (June 2024) replace this part with a corrected one.
S-350-60 Power Supply.fzpz (7.0 KB)
Peter
has anyone bought oyostepper.com before?


