Looking for mini toggle switches (MTS-102 / MTS-202 / MTS-203)

Hi everyone,

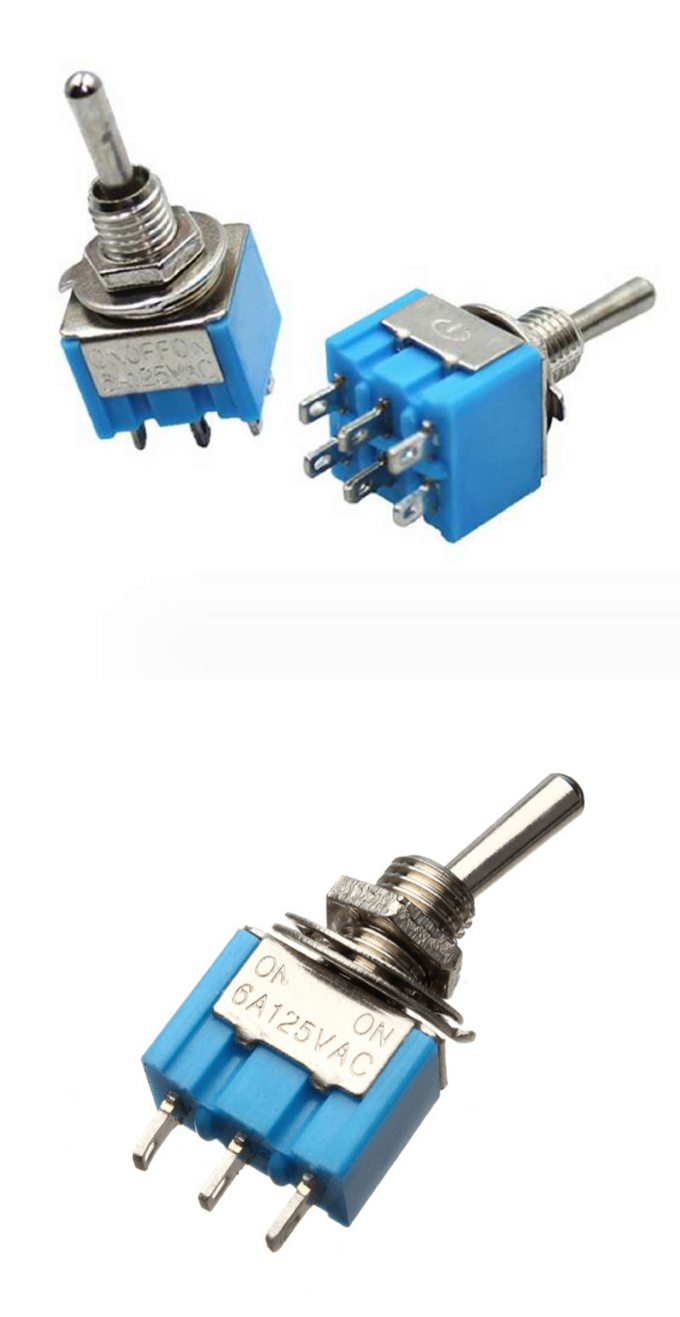
I’m looking for a Fritzing footprint/part for these types of mini toggle switches. They are the common blue-body switches used in many electronics projects.

Here are the images for reference:

I need the footprints for both versions:

  • 3-pin SPDT (MTS-102)

  • 6-pin DPDT (MTS-203)

Thanks in advance!

A google search of the form “fritzing part toggle switch” will give you the various options for switches (there are also some in cor parts.) In general there are too many switches to make new parts for each switch.

Peter

Thanks for your reply, I was able to find the forum threads that discuss these switches.

6-pin DPDT (MTS-203)
Hello Peter (@Vanepp),
i’m pretty new to Fritzing and searching since hours for a toggle switch with dual “on-off-on” positions, but could not find anything.
Could you evtl. help`?

Good evening,
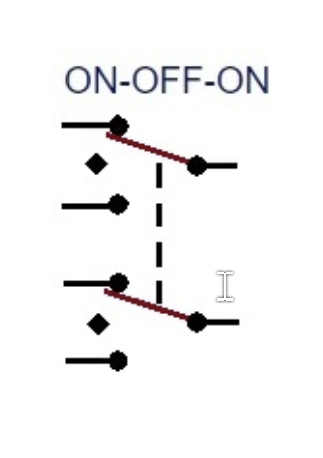
could you send me the switch symbol, if necessary hand-drawn. I could only find an ON-ON-ON switch. But from that I can make an ON-OFF-ON.
Regards, Harald!

Good Morning Harald,
here is the symbol you asked for:


Regards
Joachim

All right, I’ll give it a try today.

I wasn’t sure about the switch symbol, since there are a few versions floating around online. I think I’ll get back to you this evening.

Regards, Harald!

Some work was already done on these toggle switches here:

Note that they can’t be used on a breadboard directly.
A typical solution is a flyboard ( a very simple breakout board).

So, you’d draw the breadboard view of the switch on top of a PCB, that has breadboard compatible pins on the bottom side.

@KjellM
If I understand correctly, it’s about a toggle switch with 3 toggle positions:
ON OFF ON
and all of that with 2x3 contacts, wouldn’t this model that Peter has already worked on be a better fit?

Taiway sub min dpdt toggle switch

The switch shouldn’t be plugged into a Breadboard either, right?

Yes, I was mislead by the title, and didn’t notice that the topic changed later on to a different switch. I marked the according post as of topic. Better create a new one and copy a link.

@Harald_Rau
Hi Harald,
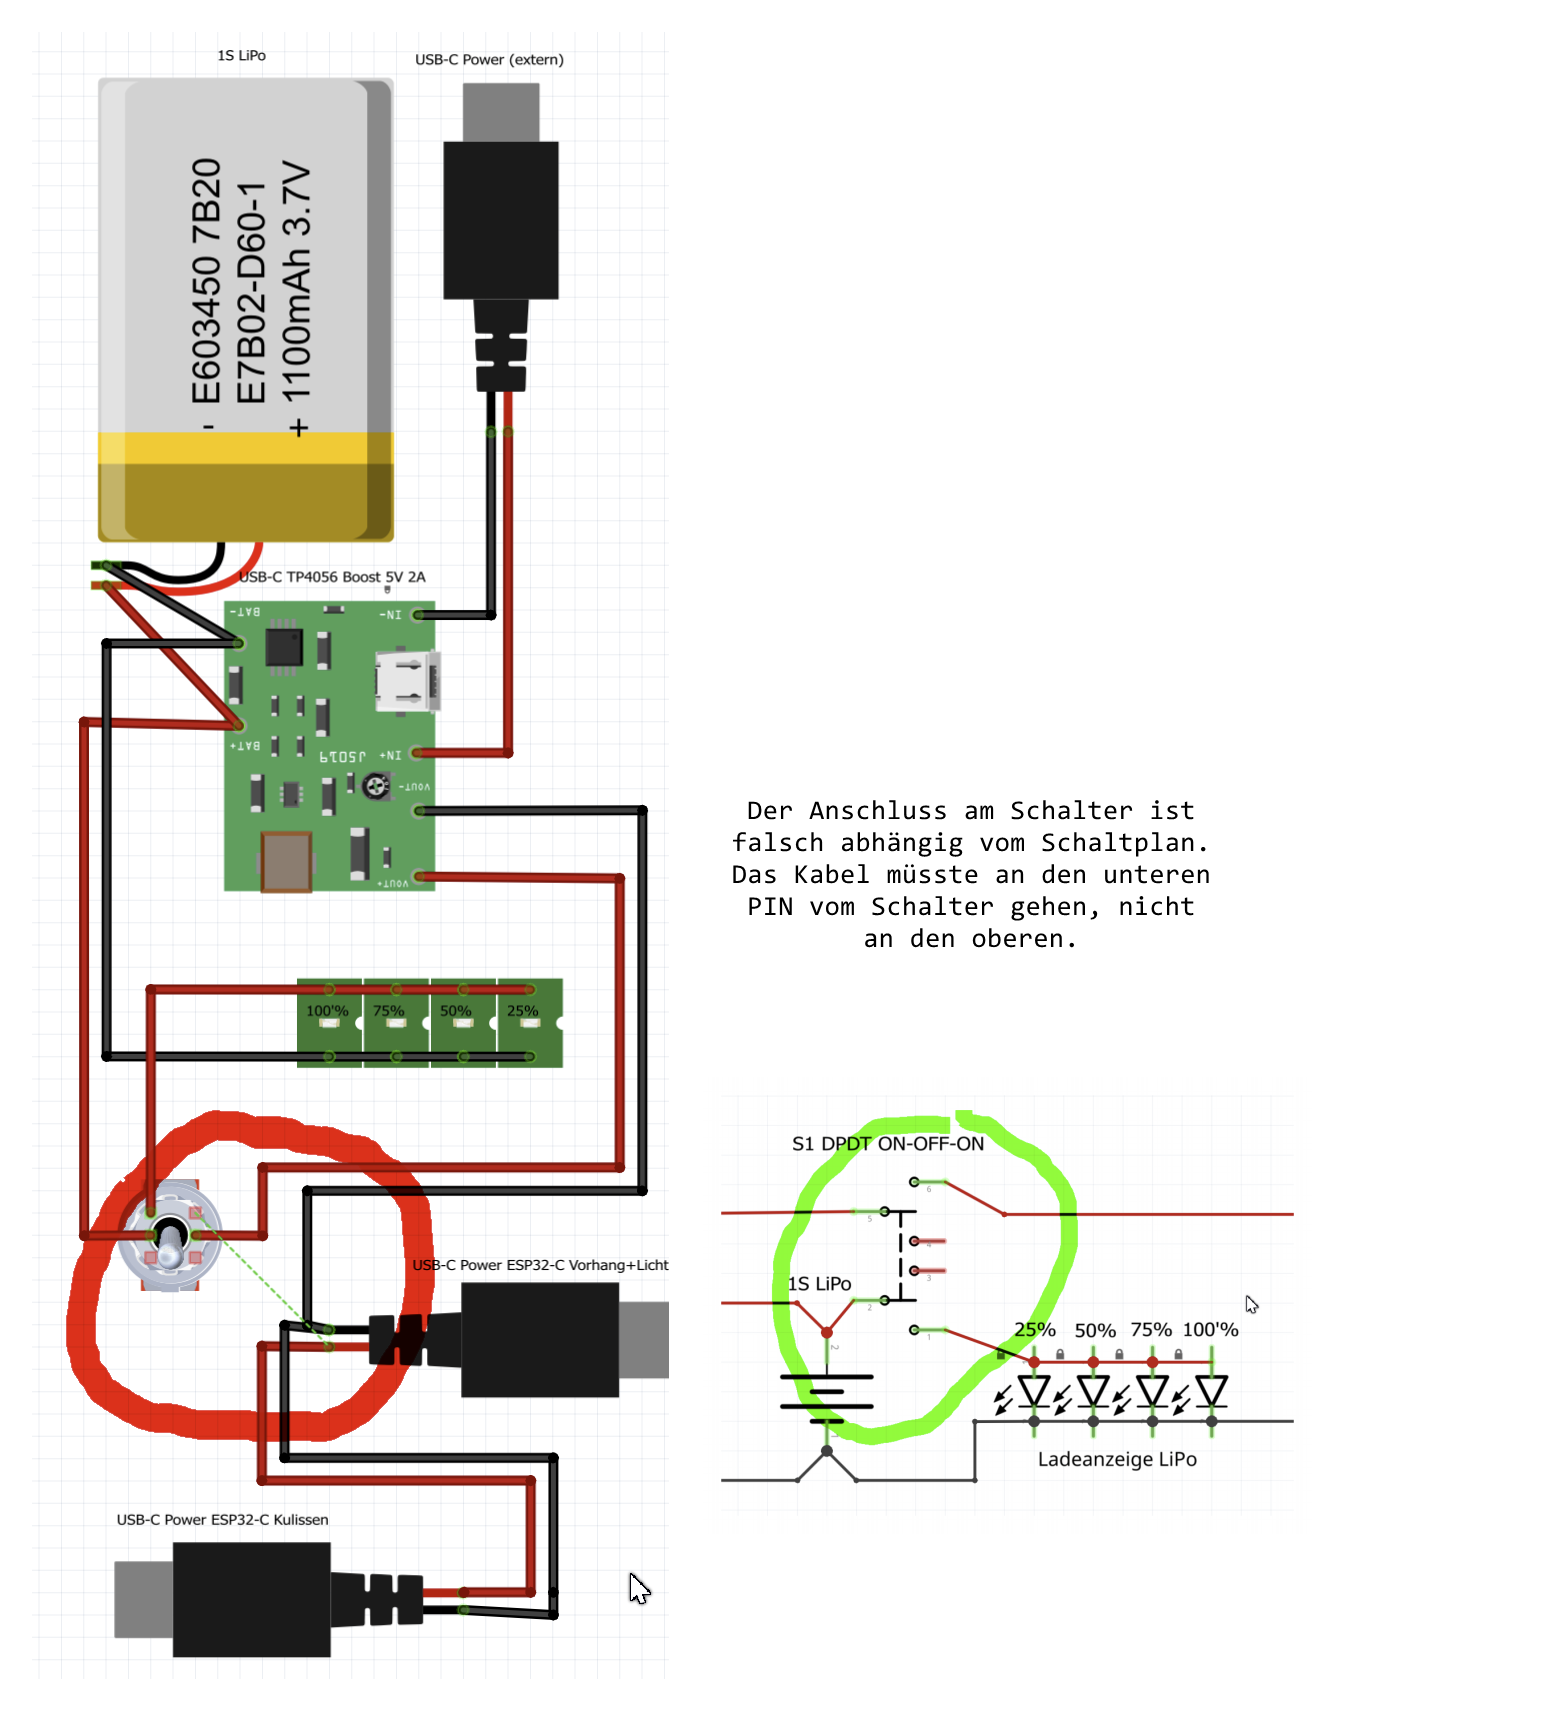
you’re fully right: 3 Positions On-Off-On, 2x3 contacts, not to be plugged into a breadboard!
Btw. there are also 1x3 contacts and 3x3 contacts in the market available!
Cheers
Joachim

Hello Joachim,

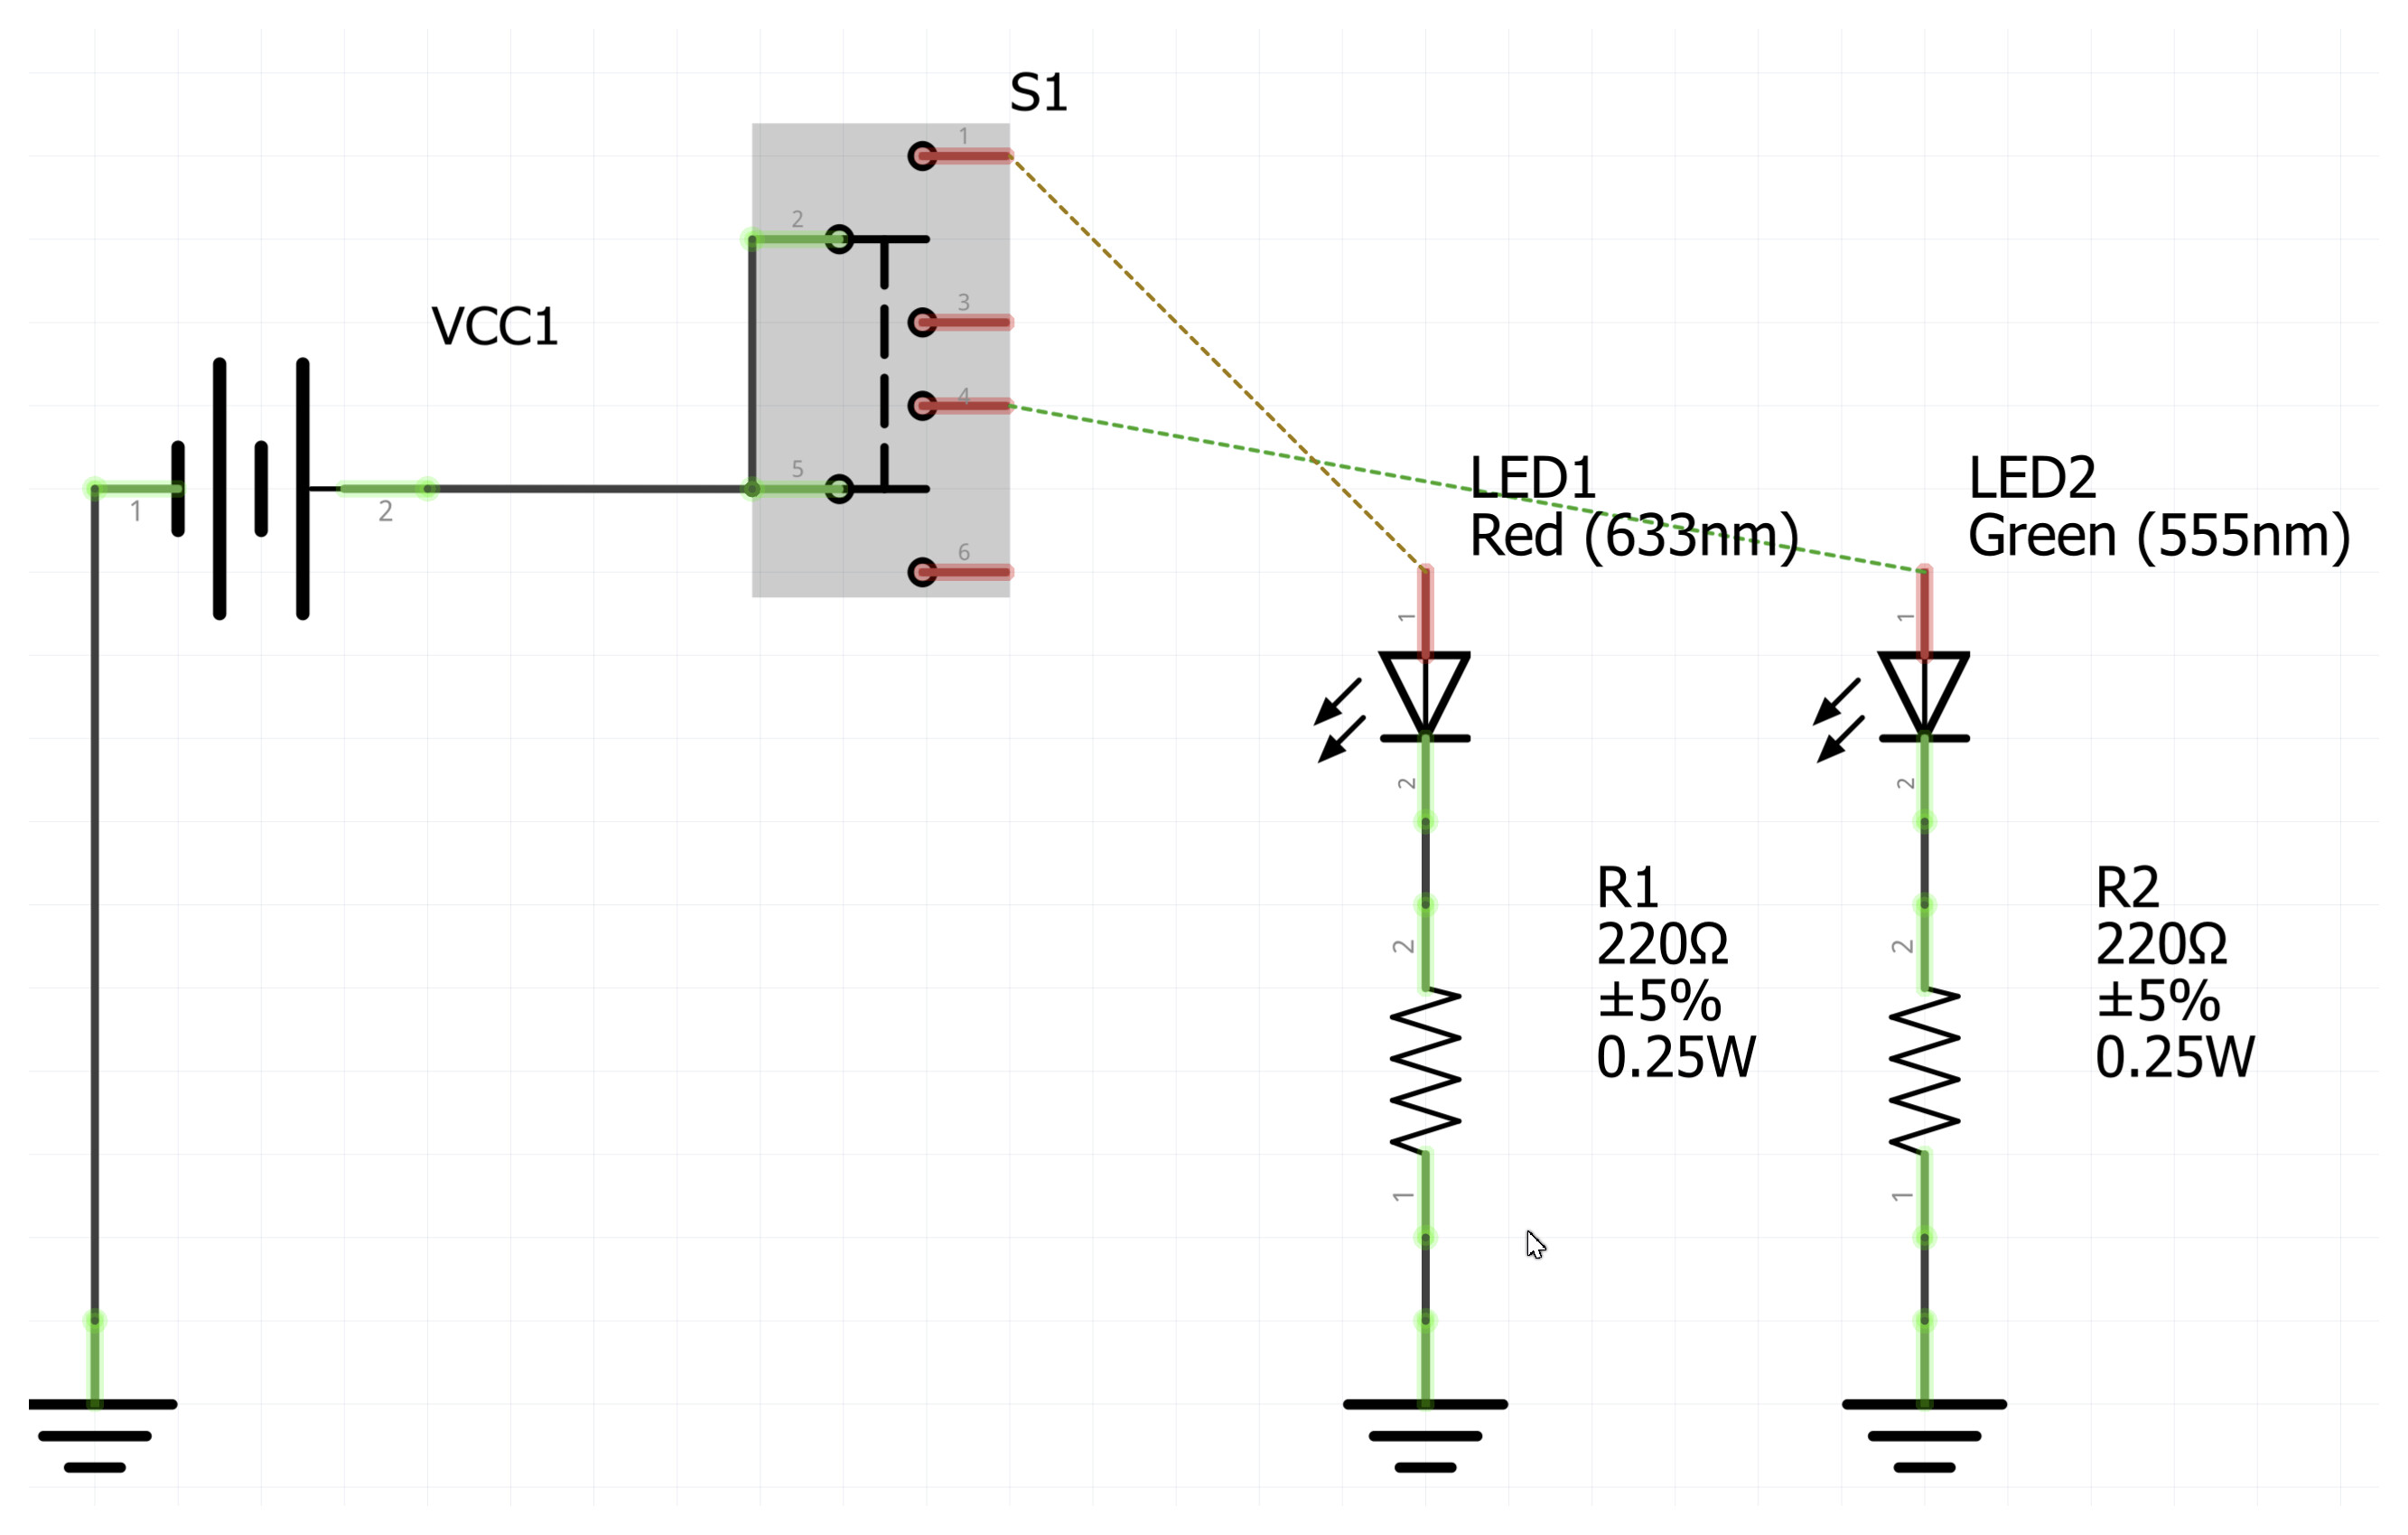
I’ve drafted an initial variant. In doing so, I took the following into account.

For the switch symbol, I was guided by the IEC 60617 standard. On page 12 you can find the symbol for 3 contacts. I then expanded it to 6 contacts and added the actuator.

IEC 60617

For the PCB view, I left Peter’s as is, except for the square for the GND connection. I assume the switch has no GND connection. I couldn’t find the exact dimensions, as there are many variants of it. So it has to be connected to the PCB by wires (you can’t solder it onto the board).
I hope that helps you for now.

Beispiel.fzz (82,0 KB)

Switch-dpdt-ON-OFF-ON.fzpz (75,4 KB)

Maybe someone can check the part again?

Regards, Harald!

1 Like

I haven’t done that yet; how do I do that?

Regards, Harald!

Hi Harald,

Unfortunately, it’s not quite working yet:
The switch connections don’t match the circuit diagram:

You can also see it in your example file, which I’ve modified.

The switch is supposed to work in reverse in this circuit:

Switch up: LED1 on pin 1 lights up

Switch middle: Everything off

Switch down: LED2 on pin 6 should light up, but the routing points to pin 4

Conclusion:
If I change the circuit diagram, the routes on the breadboard are incorrect, and vice versa.

Regards,
Joachim


Yes, I already thought so. The reason is that it’s always supposed to be numbered counterclockwise. But I can change that…

Here is the modified file:

Switch-dpdt-ON-OFF-ON.fzpz (76,2 KB)

Is this better now?

You could try inserting your sample file.

Regards, Harald!

195
Unfortunately, I can’t import this:

I’m a little doubtful that it’s due to the PIN numbering; I suspect it’s more likely a routing problem.

Stromversorgung_Buehne_Sender.fzz (107.3 KB)

…did you delete the old one? It kept the same ID, of course, so that can lead to a conflict.

I’ll be on the road tomorrow and won’t be able to get back to you until the evening.

You definitely need to delete the previously imported component first, and only then import it again.