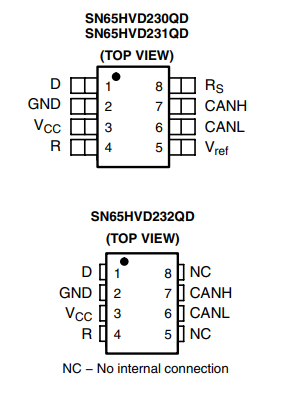
I need the SN65HVD230D part, to install directly to the pcb
Name of the part❗SN65HVD230Q
Top view❗
Datasheet❗
Please add a link to PDF of the manufacturers datasheet. Here, a link is fine.
3.3-V CAN Transceivers datasheet (Rev. A)
Footprint
Type
vanepp
November 24, 2025, 5:22pm
2
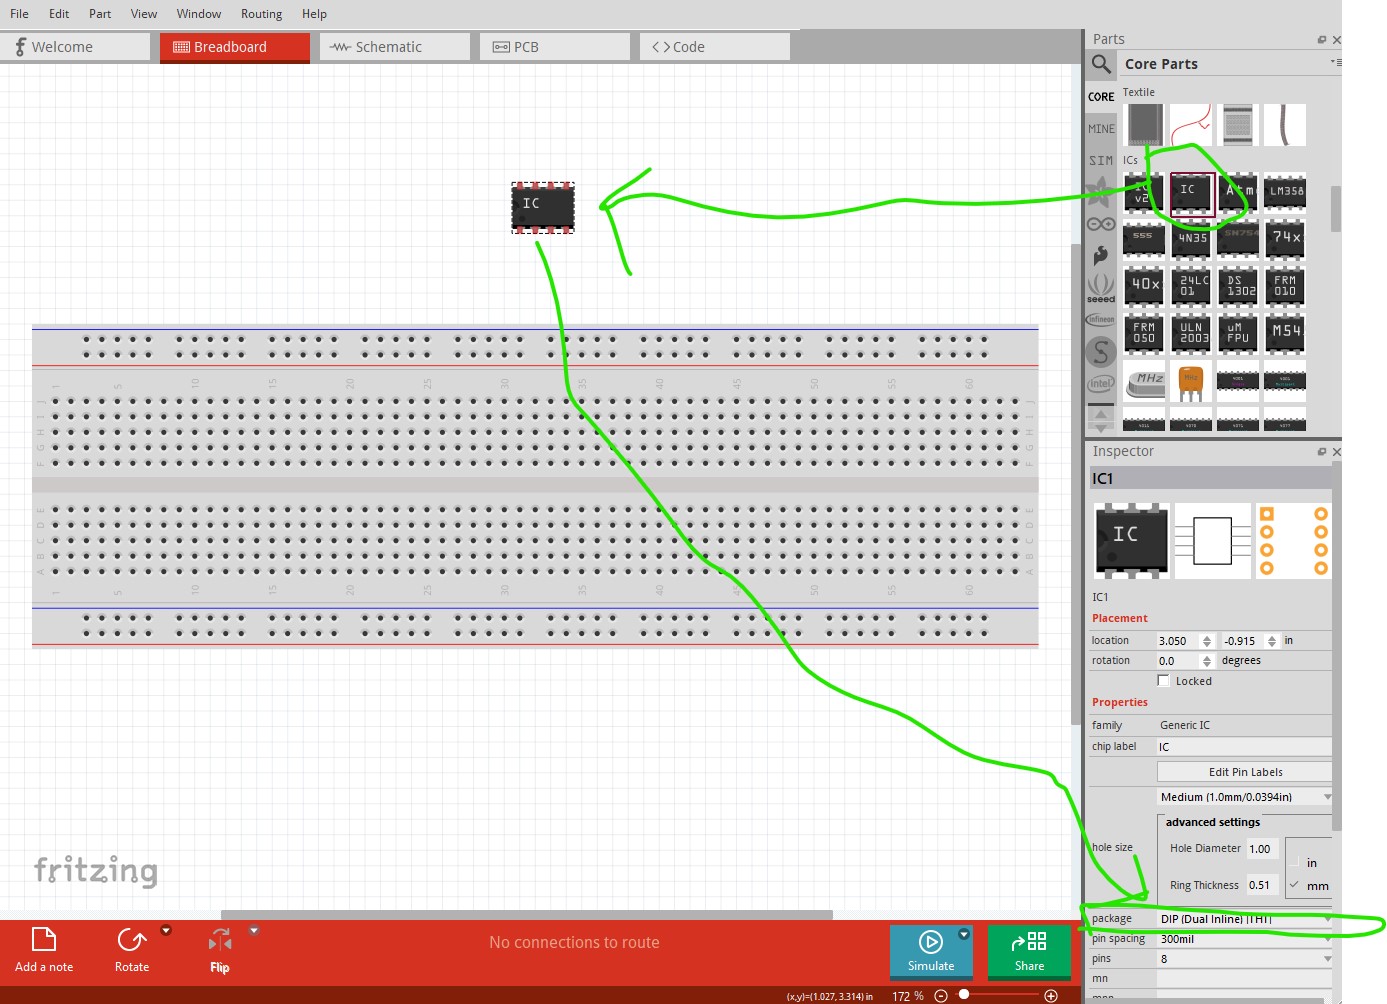
You can make this part for yourself by using the generic IC. This tutorial tells you how:
This is a continuation of
As I lately decided to merge this tutorial with Peter’s part creation series, I left the links behind. Never mind, I’ll just leave them there as a reminder.
In this tutorial, you are going to learn how to make Fritzing Parts.
You need these apps ready:
1. Fritzing (of course)
Download Fritzing here:
https://fritzing.org/download/
Alternative payment method (without using PayPal):
https://fritzing.org/download?payment_method=alt
2. Inkscape
Download Inkscape h…
Peter
KjellM
November 25, 2025, 1:37pm
3
Starting with the generic IC is a good idea, you can already sketch schematic and or breadboard with it.
Note that the generic part will just produce DIP footprints, however.
Fritzing already comes with some parts that use SOIC-8,
Make sure connectors are properly associated (the SVG might use different connector IDs)
And of course validate the footprint with the actual recommendation.
Hi, i tried to make for myself but i got some problem. Can you please help me to fix this?
SN65HVD230Q.fzpz (3.9 KB)
vanepp
November 26, 2025, 5:47pm
5
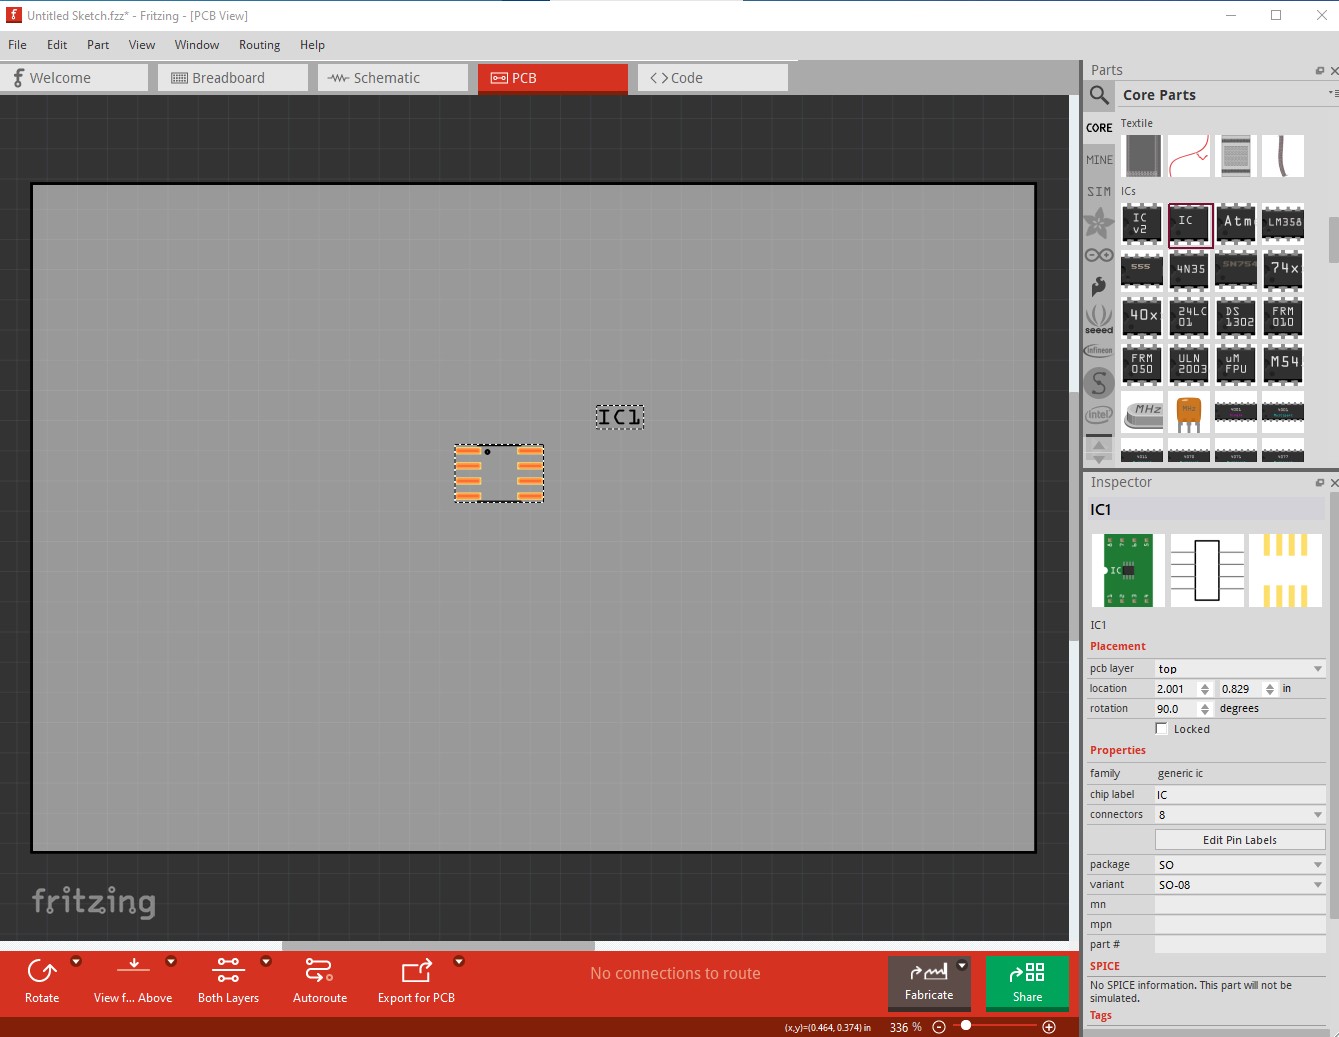
While it is possible to correct your part, it is a lot of work and using the generic IC is easier. To do so first drag the generic IC in to the sketch:
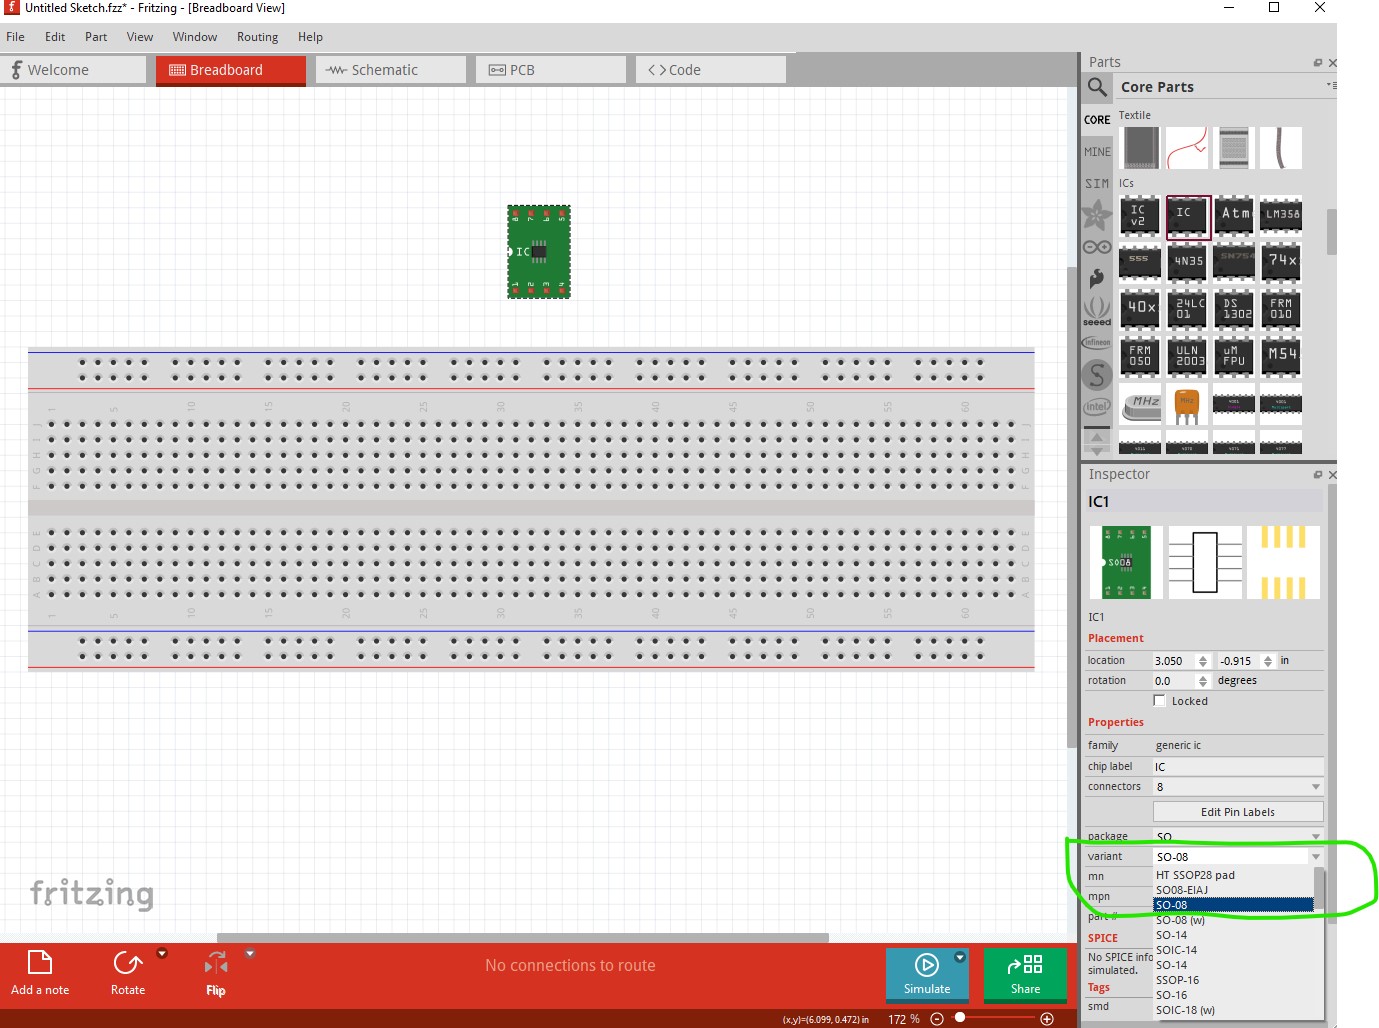
Then change the package to SO8 which appears to be what you want.
Which changes breadboard to a SMD adapter and pcb to the correct footprint
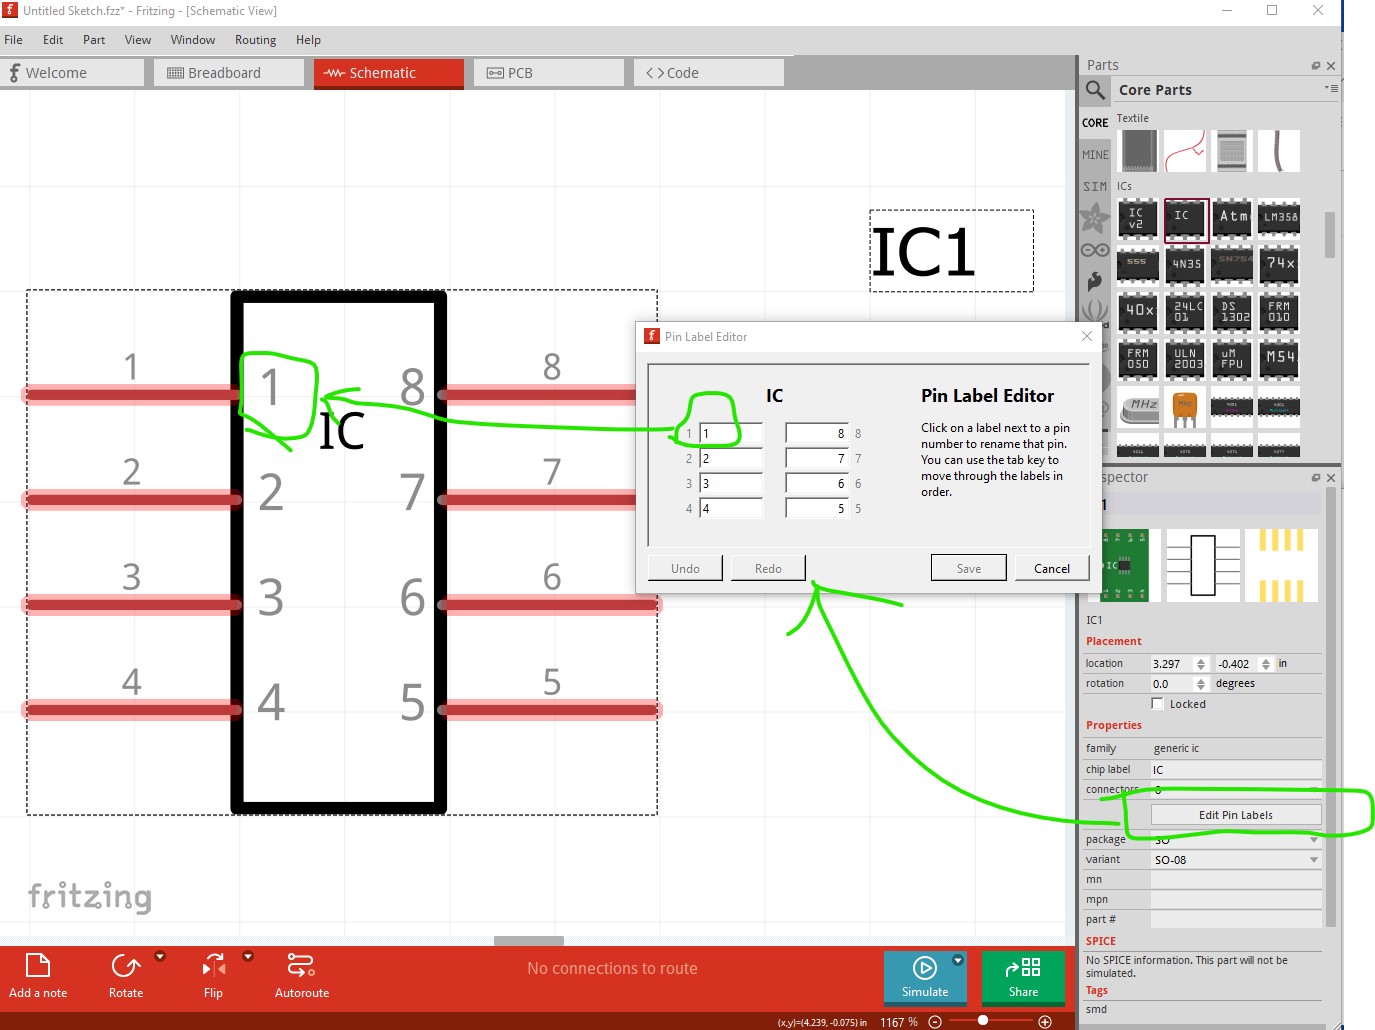
then in schematic edit the pin labels to set the pin names correctly and save the part.
All of this is in the tutorial that I referred you to.
Peter