Installation Procedure {Linux}

{Tested and Working on Ubuntu 20.04 LTS} {Fritzing 0.9.4}

Hello!
I’ll show you a described way to install Fritzing on your Linux machine with less hassle.

Let’s Start with Downloading the most recent version!
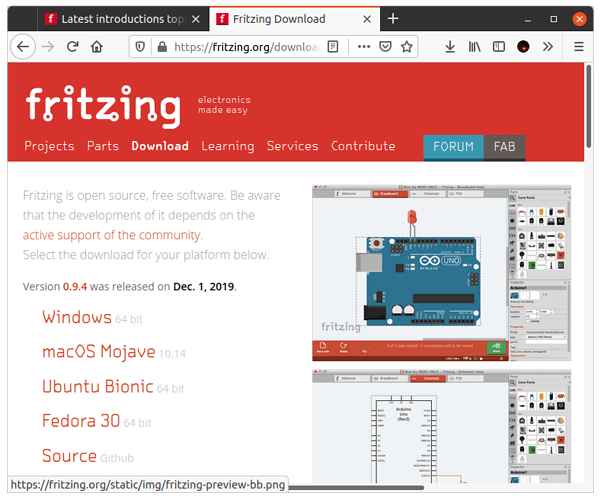
Here:- https://fritzing.org/download/

  • Select your System on which you want to install it.

  • Next save it in your desired location.

  • Open the downloaded Archive and extract it to ~/Fritzing
    {This basically means your Home directory}

  • Open your terminal in that folder and run the software by using command: ./Fritzing

To add fritzing to your Launcher like a normal app:

  • Navigate to fritzing app folder

  • Open org.fritzing.Fritzing.desktop file in text editor and change the following:
    Exec= “path to your fritzing binary”
    Icon= “path to your fritzing icon file in the fritzing root directory”

  • Save it and then head over to your terminal and type the following:
    sudo nautilus

  • It will open your file manager with root permission {Be careful not to do anything beside what i tell you}, find your .desktop file and copy it and then paste it to:
    /usr/share/applications/usr/share/applications

*Then go to your fritzing software directory, open the terminal and run fritzing partial install script with the command:
./install_fritzing.sh -u
:- " -u will install Fritzing in user mode (recommended, optimal)"
:- " -s will install Fritzing in system mode (for global use)"
:- " -u & -s should not be mixed"

  • Close everything and restart your system and you’re done!

Problems You might face:

  • While running for the first time, It might look like stuck on splash screen.
    Do not close or kill it, it will lead to a Library Corruption, Instead allow it to run for a while, as it is pulling updates from GitHub Repo.

  • Open executing Fritzing from terminal using ./Fritzing , Throws this error:-

Solution:- This means that you don’t have the libraries or Fritzing is just unable to find them for some reason. Execute the following commands in terminal:

sudo apt-get update
sudo apt-get upgrade
sudo apt install libqt5printsupport5 libqt5xml5 libqt5sql5 libqt5serialport5 libqt5sql5-sqlite

It will install the required library if missing, and you’re good to go!

  • Installing with sudo apt-get install fritzing ?
    It will install and older version of Fritzing 0.9.3b and i recommend you to download the recent from the webpage : https://fritzing.org/download/

Thank you for Reading,
Shigarf :grin:

Posted: 2020-05-28T18:30:00Z
Edited: 2020-05-29T18:30:00Z
1 Like

I tried to test your instructions on a fresh Ubuntu 18.04 virtual machine. Your general process works, but I found problems both with specific details here, and with the installer script. Here is a summary and reference information.

If you are planning to run Fritzing directly from the command line using the downloaded folder, (the ./Fritzing option), putting the download folder in $HOME, and naming it “Fritzing” makes sense. However, that will not get the mime information configured, to allow opening Fritzing files from the file browser.

If you are planning to install Fritzing (either system or user mode), you might as well unpack the .bz2 file right in the downloads folder. After installation, that folder can be deleted. Everything needed to run Fritzing has been copied to standard locations.

There is a typo in the instructions above. The system level folder for desktop files is /usr/share/applications not /usr/share/applications/usr/share/applications.

If doing a user mode install (either ./install_fritzing.sh -u or ./install_fritzing.sh), the desktop file is put in ~/.local/share/applications. There is no need to use root privileges to copy it to the system folder.

The cannot open shared object file error can be avoided by doing the prerequisite installs before running Fritzing the first time. Before doing the install is good. It does not hurt anything to run the command to install them. If they are already installed, that is reported, and nothing is changed.

The install_fritzing.sh script is supposed to set the path to the icon automatically. It has a bug for that, and a few other cases setting up the mime information. I created a bug report in the fritzing app issues, and attached an improved version of the script over there.

The stream lined instructions becomes:

sudo apt-get update
sudo apt-get upgrade
sudo apt install libqt5printsupport5 libqt5xml5 libqt5sql5 libqt5serialport5 libqt5sql5-sqlite

Download the archive file
unpacked someplace (like the Downloads folder)
download the repaired install_fritzing.sh file from the problem report (The forum does not like uploading text files)
copy the install script over the existing file in the unpacked folder (making sure it is set to be executable)
cd to the unpacked folder

./install_frizing.sh

Adding “-u” at the end is optional. If nothing is specified, “-u” is assumed.

Delete the unpacked folder and bz2 download file.

Restart your system, and everything should be ready to go. With the potential delay the first time Fritzing is run.

EDIT: Reading the information on the download page CAREFULLY shows that the recommended way of running fritzing is the ./Fritzing command line option, or double clicking Fritzing from the file browser. install_fritzing.sh is not supposed to be used. It is known to be broken. I do not know if my fixes are enough to change that recommendation.

Edit: ./install.sh is known to be broken, using this script is not advised.

Which is exactly why the problem was reported, and a (mostly) working script created to go with it. That has been updated again for the version 0.9.6 downloads. The script that comes with 0.9.6 should be good. Do NOT follow the instructions here about replacing the install script with the patched (and now outdated) version. Those instructions were only for the 0.9.4 installs.

Hi, I unlisted the thread, to avoid others to run into this. If you think that is not a good idea, or want to change the instructions, please let me know. Also, the next version will be released as AppImage if all goes well, which will again outdate the install procedure.